The Importance of Process Documentation in a UX Project
When I am working on a UX project, things can easily get messy — sketches, flows, wireframes, user research data, notes, prototypes, and more. While I feel a strong temptation to just focus on the current UX work in front of me, I learned over time that it’s actually really important to always keep up with process documentation as I go. I’d like to share that learning with you.
Why document your process?
Here are the reasons why I think it’s important to keep up with process documentation, based on my experience:
1. It helped me see the bigger picture of a project
While deep in a UX process, I focus on the task immediately in front of me — and I tend to lose sight of where I am in the larger context. Documenting my process prevented that. Glancing at the documented version of my work always gave me a slightly more objective view of the project as a whole.
2. It helped me track what changes I made, and why
When I made design changes, I experienced many times that I couldn’t remember exactly how or why that happened. Things got messy, and it was always hard to pinpoint later whether a change was made based on user research feedback, a stakeholder comment, or something else entirely. Process documentation helped me stay organized so I didn’t lose sight of the cause-and-effect relationships that occurred over the course of the design process.
3. It made a project almost portfolio-ready
Process documentation is a critical artifact and a record of a project. This was extremely useful when I wanted to put together an in-depth case study for a job interview. Of course I had to create a more simplified version tailored to each specific interview, but the foundational information was already there in my process documentation — which made it super easy. No need to dig through old files or try to reconstruct what happened on a project from a few years ago.
Which format?
From my experience, a presentation format — Microsoft PowerPoint or Apple Keynote — worked better than document formats like Microsoft Word or web-based platforms like Confluence.
Microsoft Word doesn’t work well for on-screen presentation. Presentation screens are landscape, and content works better when it doesn’t require scrolling.
Confluence, while commonly used for project communication and documentation, has its own problems:
- Things can easily get out of control
- It makes content harder to archive when you leave a company
A presentation format also helped me organize and summarize key points so that everything fits on one screen.
How to organize
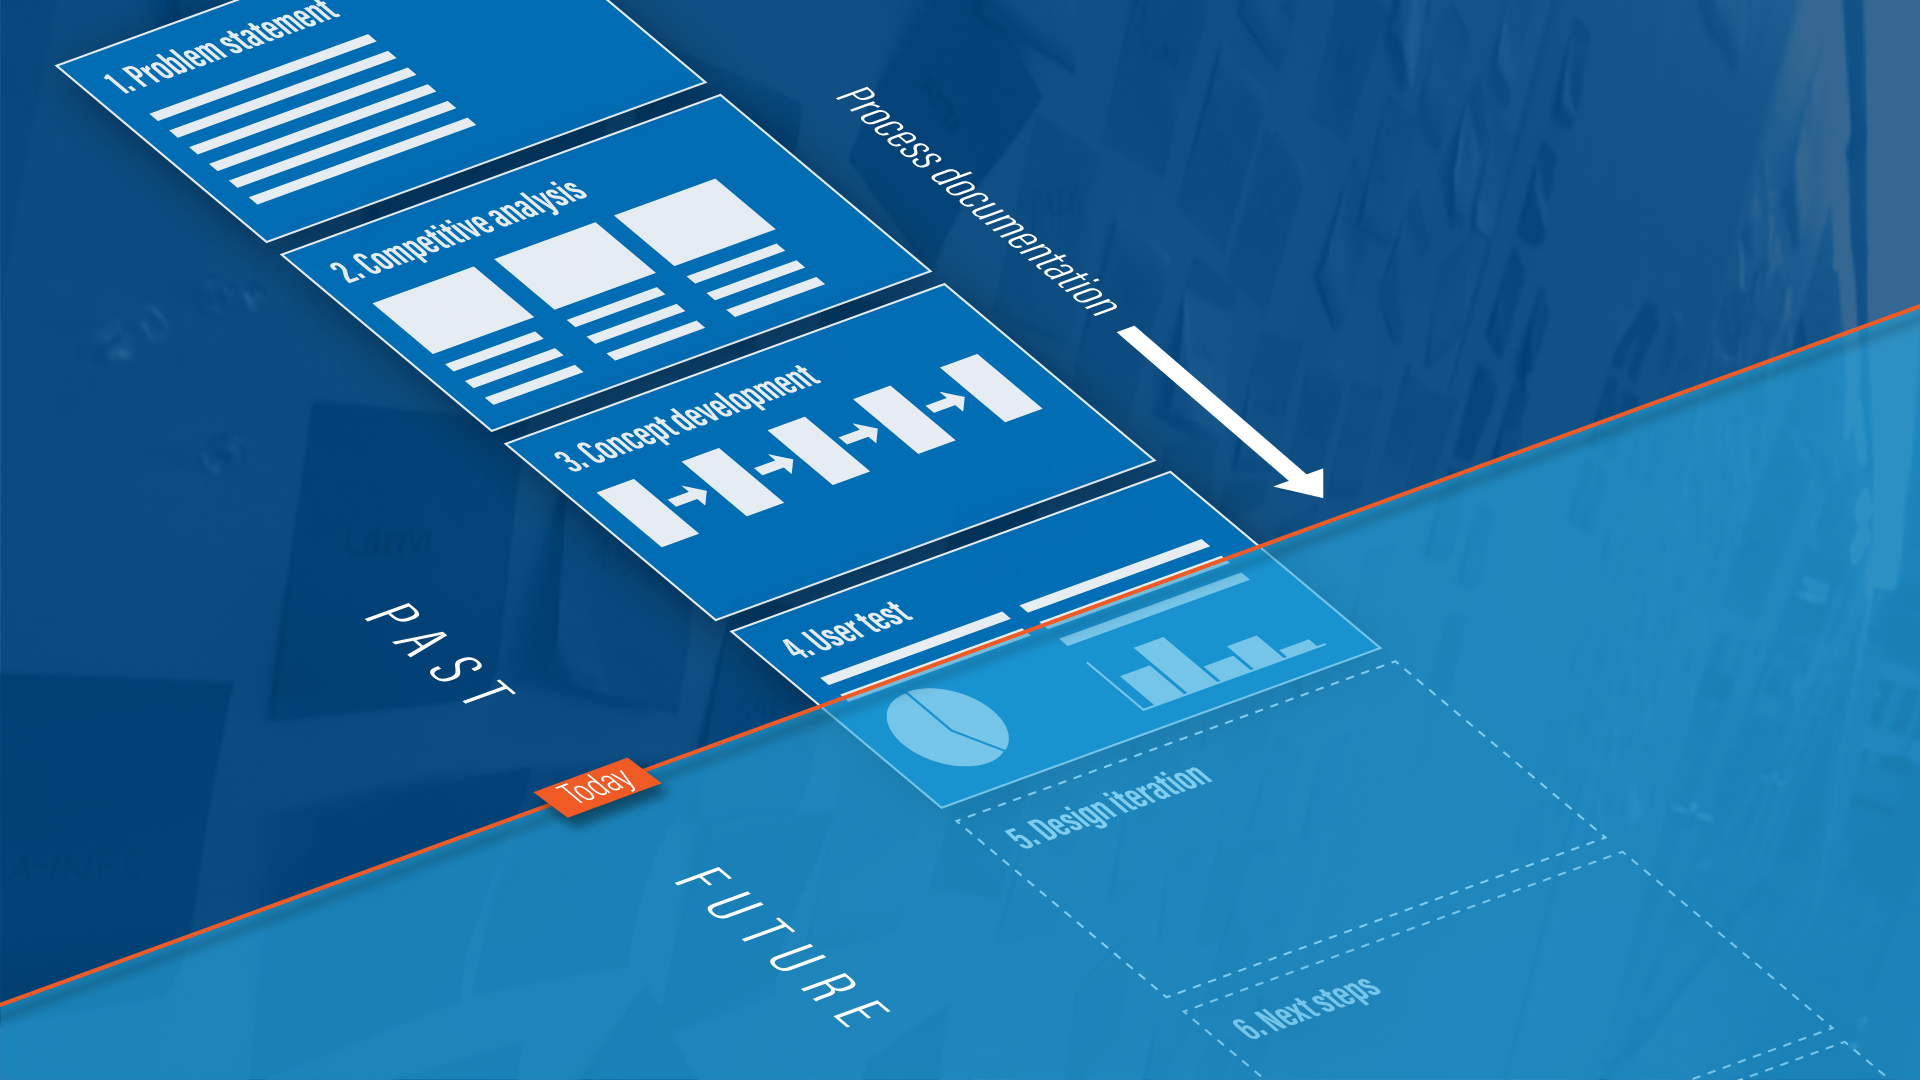
When I work on a UX project, I typically follow a UX process. Naturally, my process documentation roughly follows that process in chronological order, so I can easily trace the progression of the project.
Here is one example of how documentation can be organized, based on a process framework I typically use:
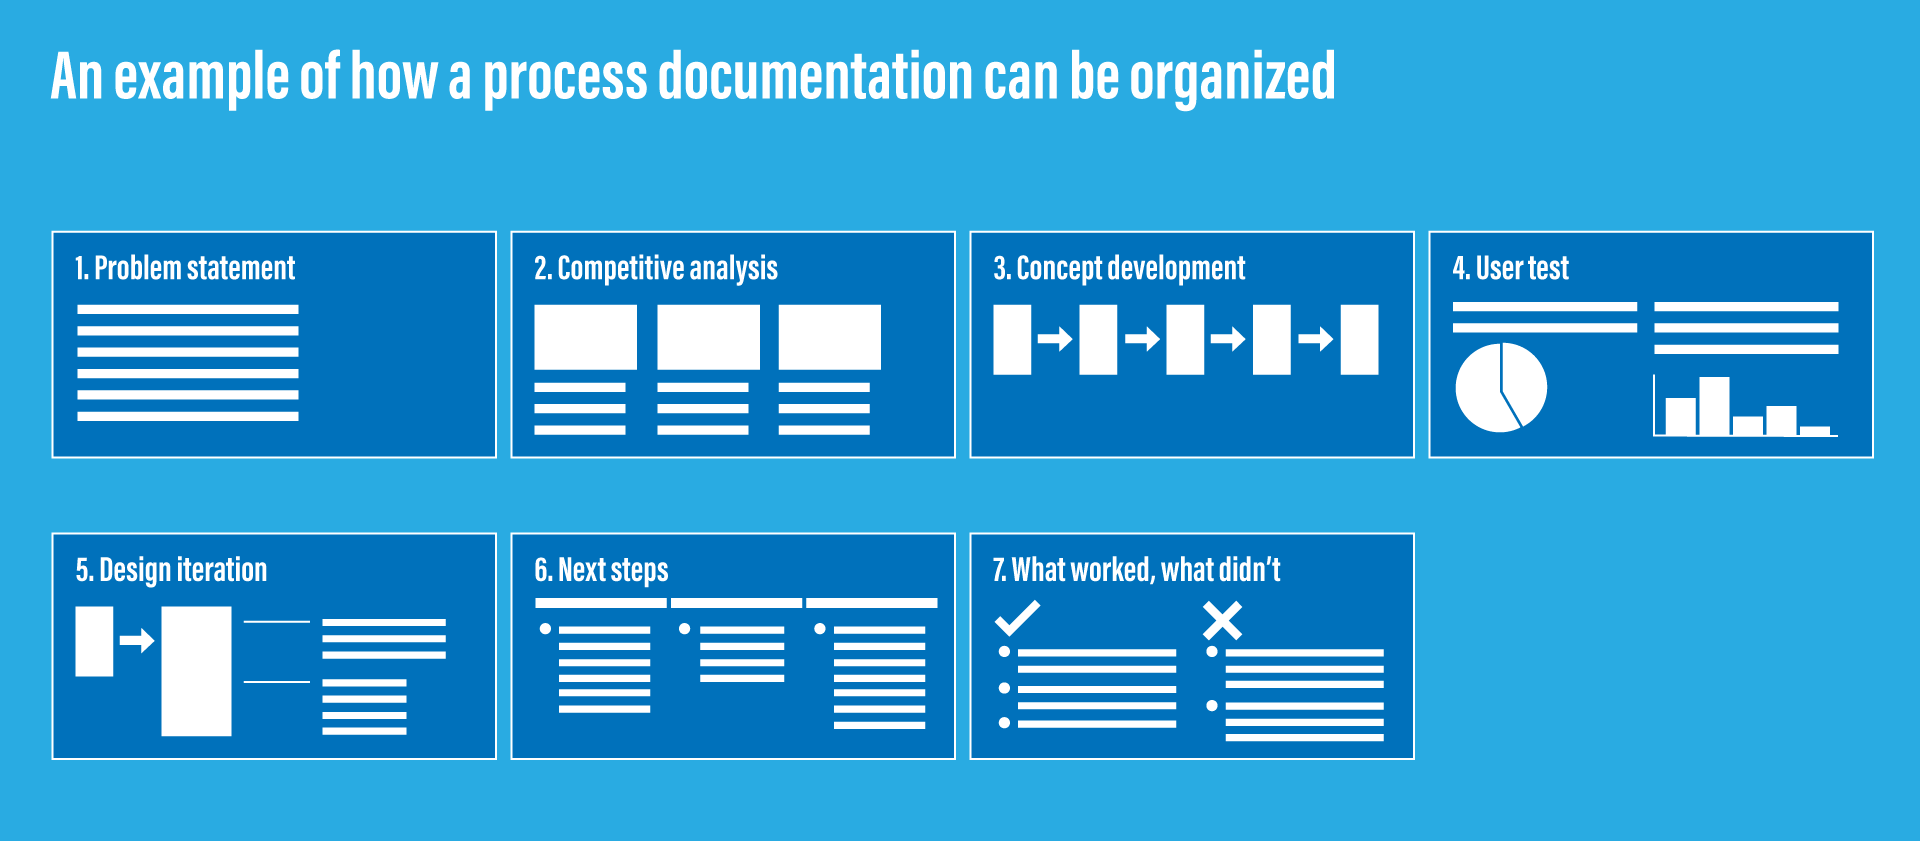 An example of how a process documentation can be organized
1. Problem statement
I define the problem I’m tackling clearly at the beginning.
Additionally, I often create separate slides for: project background, goal, team structure (including my role and responsibilities), timeline, and project type (launched product, future concept proposal, etc.).
2. Competitive analysis
I typically find it very useful to do a competitive analysis for any project. The learnings can significantly impact design decisions and output — so it’s important to document how I researched the competition, what I learned, and how those learnings influenced my work.
3. Concept development
This is where IA diagrams, task flows, wireframes, and prototypes go.
If I did brainstorming or workshop activities to generate and expand ideas, I document those too — with images and an output summary.
4. User test / user research
User research findings are typically the most important outcome of the research phase. Each finding should have concrete actions associated with it.
Other things to include:
- Research framework (what was tested and how)
- Research overview (when, how many participants, session length, format)
- Brief summary of each participant’s profile
- Photos from research sessions — these give the audience a visual sense of how sessions were conducted
- Insightful user quotes, highlighted as part of the findings summary
No need to include every single detail, but covering the above gives a clear overview of what was learned and how actions were defined based on those learnings.
5. Design iteration
This is where I show how the design evolved by incorporating learnings from user research.
It’s important to highlight which part of the design was modified or improved, based on which user feedback, from which round of research — especially when there are multiple rounds.
6. Next steps
Depending on the project, I may add a “Next steps” section describing what should happen after step 5.
7. What worked, what did not work
It’s also helpful to spend time writing down what worked and what didn’t throughout the project.
Some project teams do postmortem sessions — I’ve experienced several of those, and they were always very helpful. If that happened, discussion points from those sessions belong here.
Acknowledging what did not work is an important part of being a UX designer. In reality, every project has things that didn’t go well. Understanding this is a great learning opportunity to do something better in the future.
To clarify and highlight successes or failures, it’s also effective to include quotes from user test participants and stakeholders.
I also find it important to include key design decisions made throughout the process, so that it becomes clear how certain decisions were made, and what reasoning drove them.
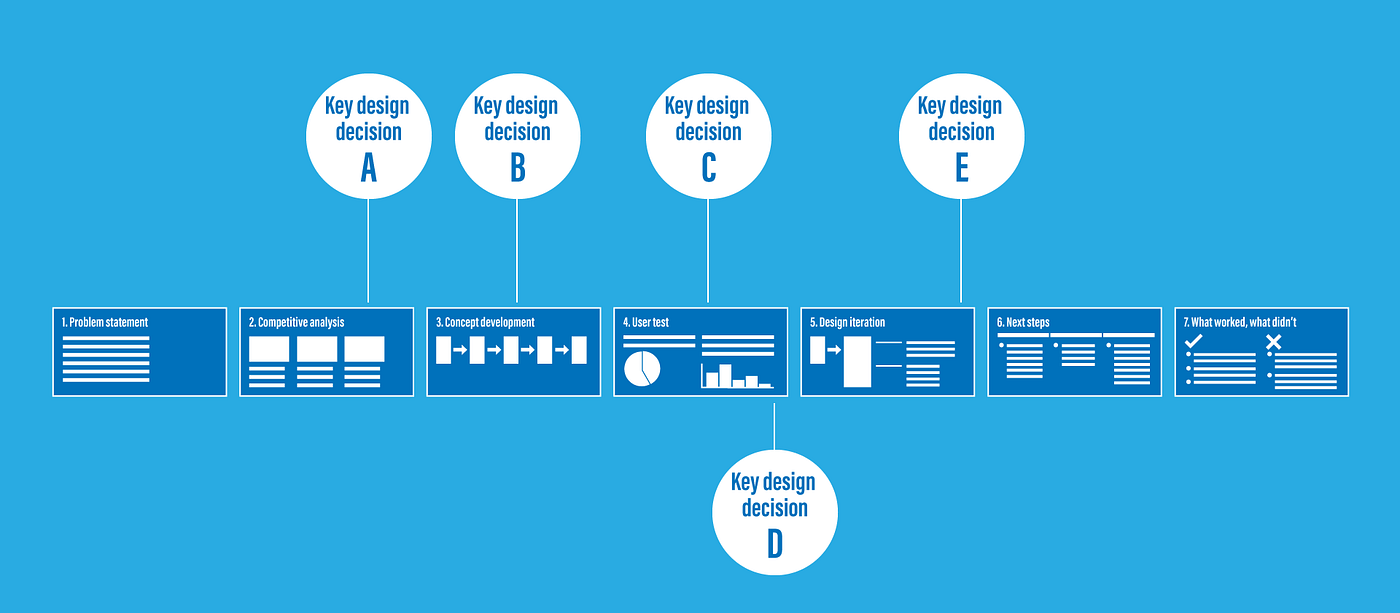 Mapping key design decisions across the process makes cause and effect visible
The key is to be selective — but include enough detail to track key learnings, insights, and changes that impacted the overall design.
From a practical standpoint, it’s also helpful to add links from the documentation back to source artifacts such as prototypes or raw user research data, so you can easily pull those up when needed.
You might feel that all of this is too much extra work on top of an already full to-do list.
But over time, you will feel grateful that you did. At least I did.
Because details and nuance fade quickly once a project is completed. Leave it for a few months — or a few years — and you won’t be able to accurately recollect what happened, why decisions were made, or what you actually learned. As long as you document while the project still has your full attention, you can capture it accurately with enough important detail to tell your story later.
Process documentation became an invaluable asset and a record of my work. That’s what I went through and found out.